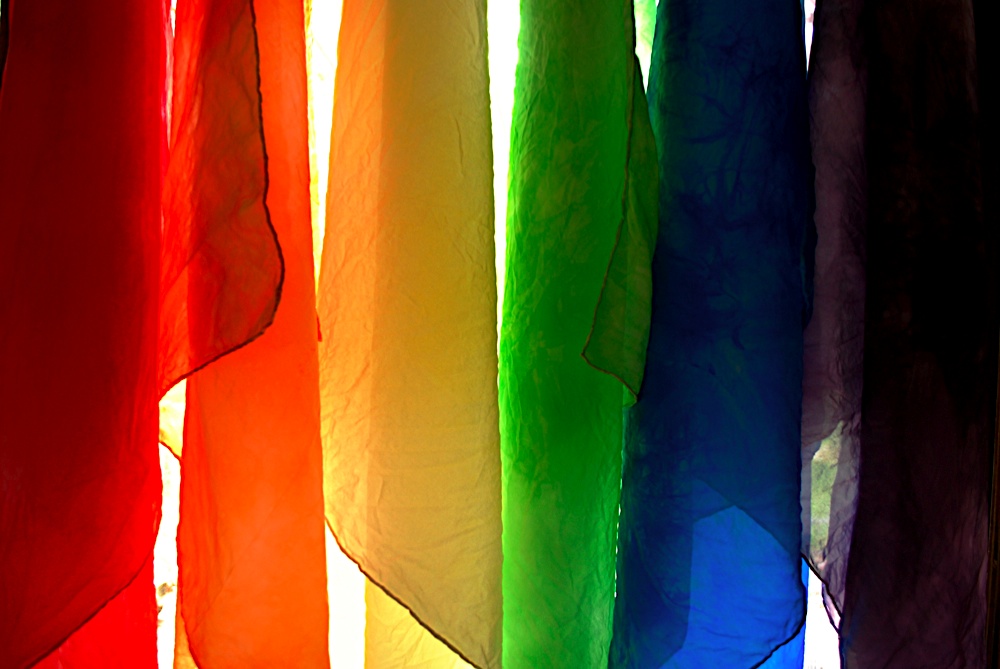
For her birthday, Bird's grammy got her some play silks. I just got around to dying them with Kool.Aid (three months later). I thought I'd share the process. Such pretty results! I used the tutorial
here and the scarves were purchased
here (we got the 30x30" ones).
I should probably apologize for not keeping my pictures in order (i.e. skipping from red to orange to purple), but I'm not going to. Such pretty colors, who cares what order they're in?
First, we soaked the scarves in hot water in the sink, with a splash of vinegar for good measure. I swished them around to make sure they were all saturated and left them until I got the rest of the supplies ready (probably closer to 20 minutes than the 30 recommended in the original tutorial).
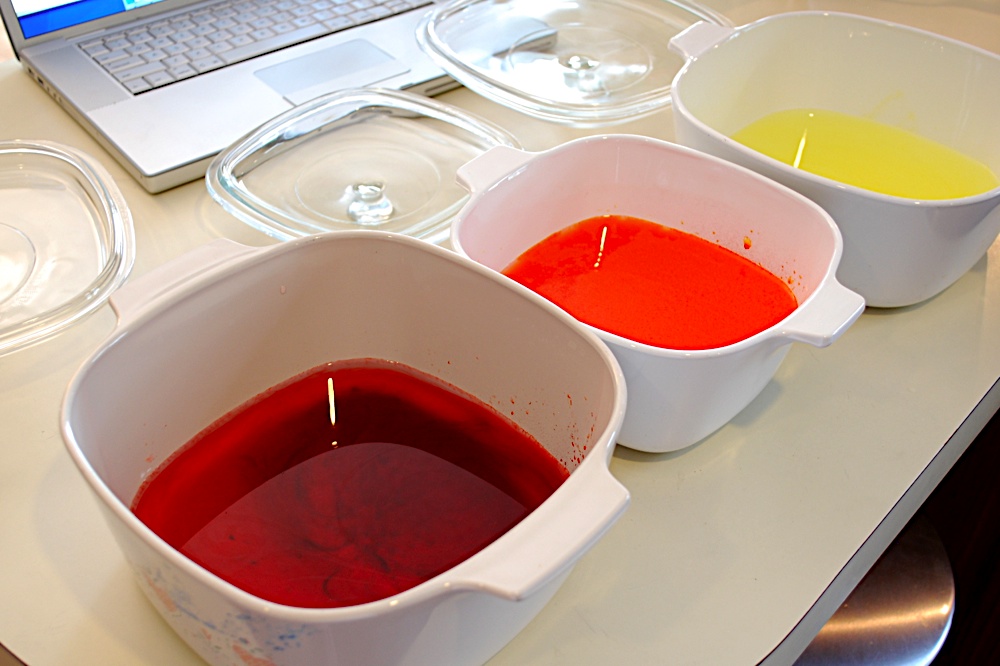
While the scarves were soaking I mixed up my dyes. These are cherry, orange and lemonade. I used two packets of colorful beverage mix as opposed to the three recommended (not making a run to the store for more!), 2 cups of water and 1/2 cup of vinegar in each microwave-safe container.
Then I gently put each scarf in its dye bath. I did this gingerly and didn't smoosh them down too much as I wanted them to look mottled and imperfect. You also don't want them too tightly balled up because then the dye won't penetrate to the middle.
I covered each dish with plastic wrap and then the lid from the dish (I'm sure the lid part is optional if you just have plastic wrap). Zap it in the microwave for three minutes, then very very carefully (steam burns hurt just as much as any other type of burn; I had to re-learn that the hard way) peel back the plastic wrap and stir your scarf around with a fork. I flipped them over so the white parts were in the dye, which was diluted by this point.
Pardon the smudgy microwave. Each scarf should be microwaved and stirred a total of three times. I did my scarves in batches of three, so after the first was done I'd pop in the second and stir the first.
The tutorial said to wait until they were cool to handle them. I, however, am horribly impatient. I dumped them into a colander and handled them with rubber gloves, holding on to just the corners (do this at your own risk, I don't want anyone getting burned). They cooled quickly when exposed to the air. Then I wrung them out and put them on the line.
After your first three colors (red/cherry, orange/orange, and yellow/lemonade) are done, repeat the process with the next three colors. I used lemon-lime for green and grape for purple. Note: I purchased tropical punch for blue as it was in a blue pouch. The beverage turned out red. As you can see on the left, I grabbed my handy dandy gel food coloring in blue and put in about a 1/2 teaspoon. That was probably overkill, but you get the idea.
After all of your scarves are done in the dye bath, they're ready for the line. After they're dry, wash them (I did this separately, by hand, with cold water and some dish soap). The red ran pretty significantly, the rest just a tad. Then back to the line until dry and you're ready for play!
So far, daddy has used them for some magic tricks. Bird has loved draping them around her neck or piling them on the floor and running through them. I am simply trying to fight the impulse to constantly rearrange them into
Roy G. Biv order (curse you elementary school art class!... not really). An added bonus: when Bird wants to drink this stuff, full of its harmful food dyes and needless sugar, I can point out that "hey, that's probably best left to using for dye! remember your play silks?"


No comments:
Post a Comment